Mapper User Interface
The Mapper interface is divided into two main sections described below:
- Mapper configuration within a plugin (in red)
- Mappings within a mapper (in green)
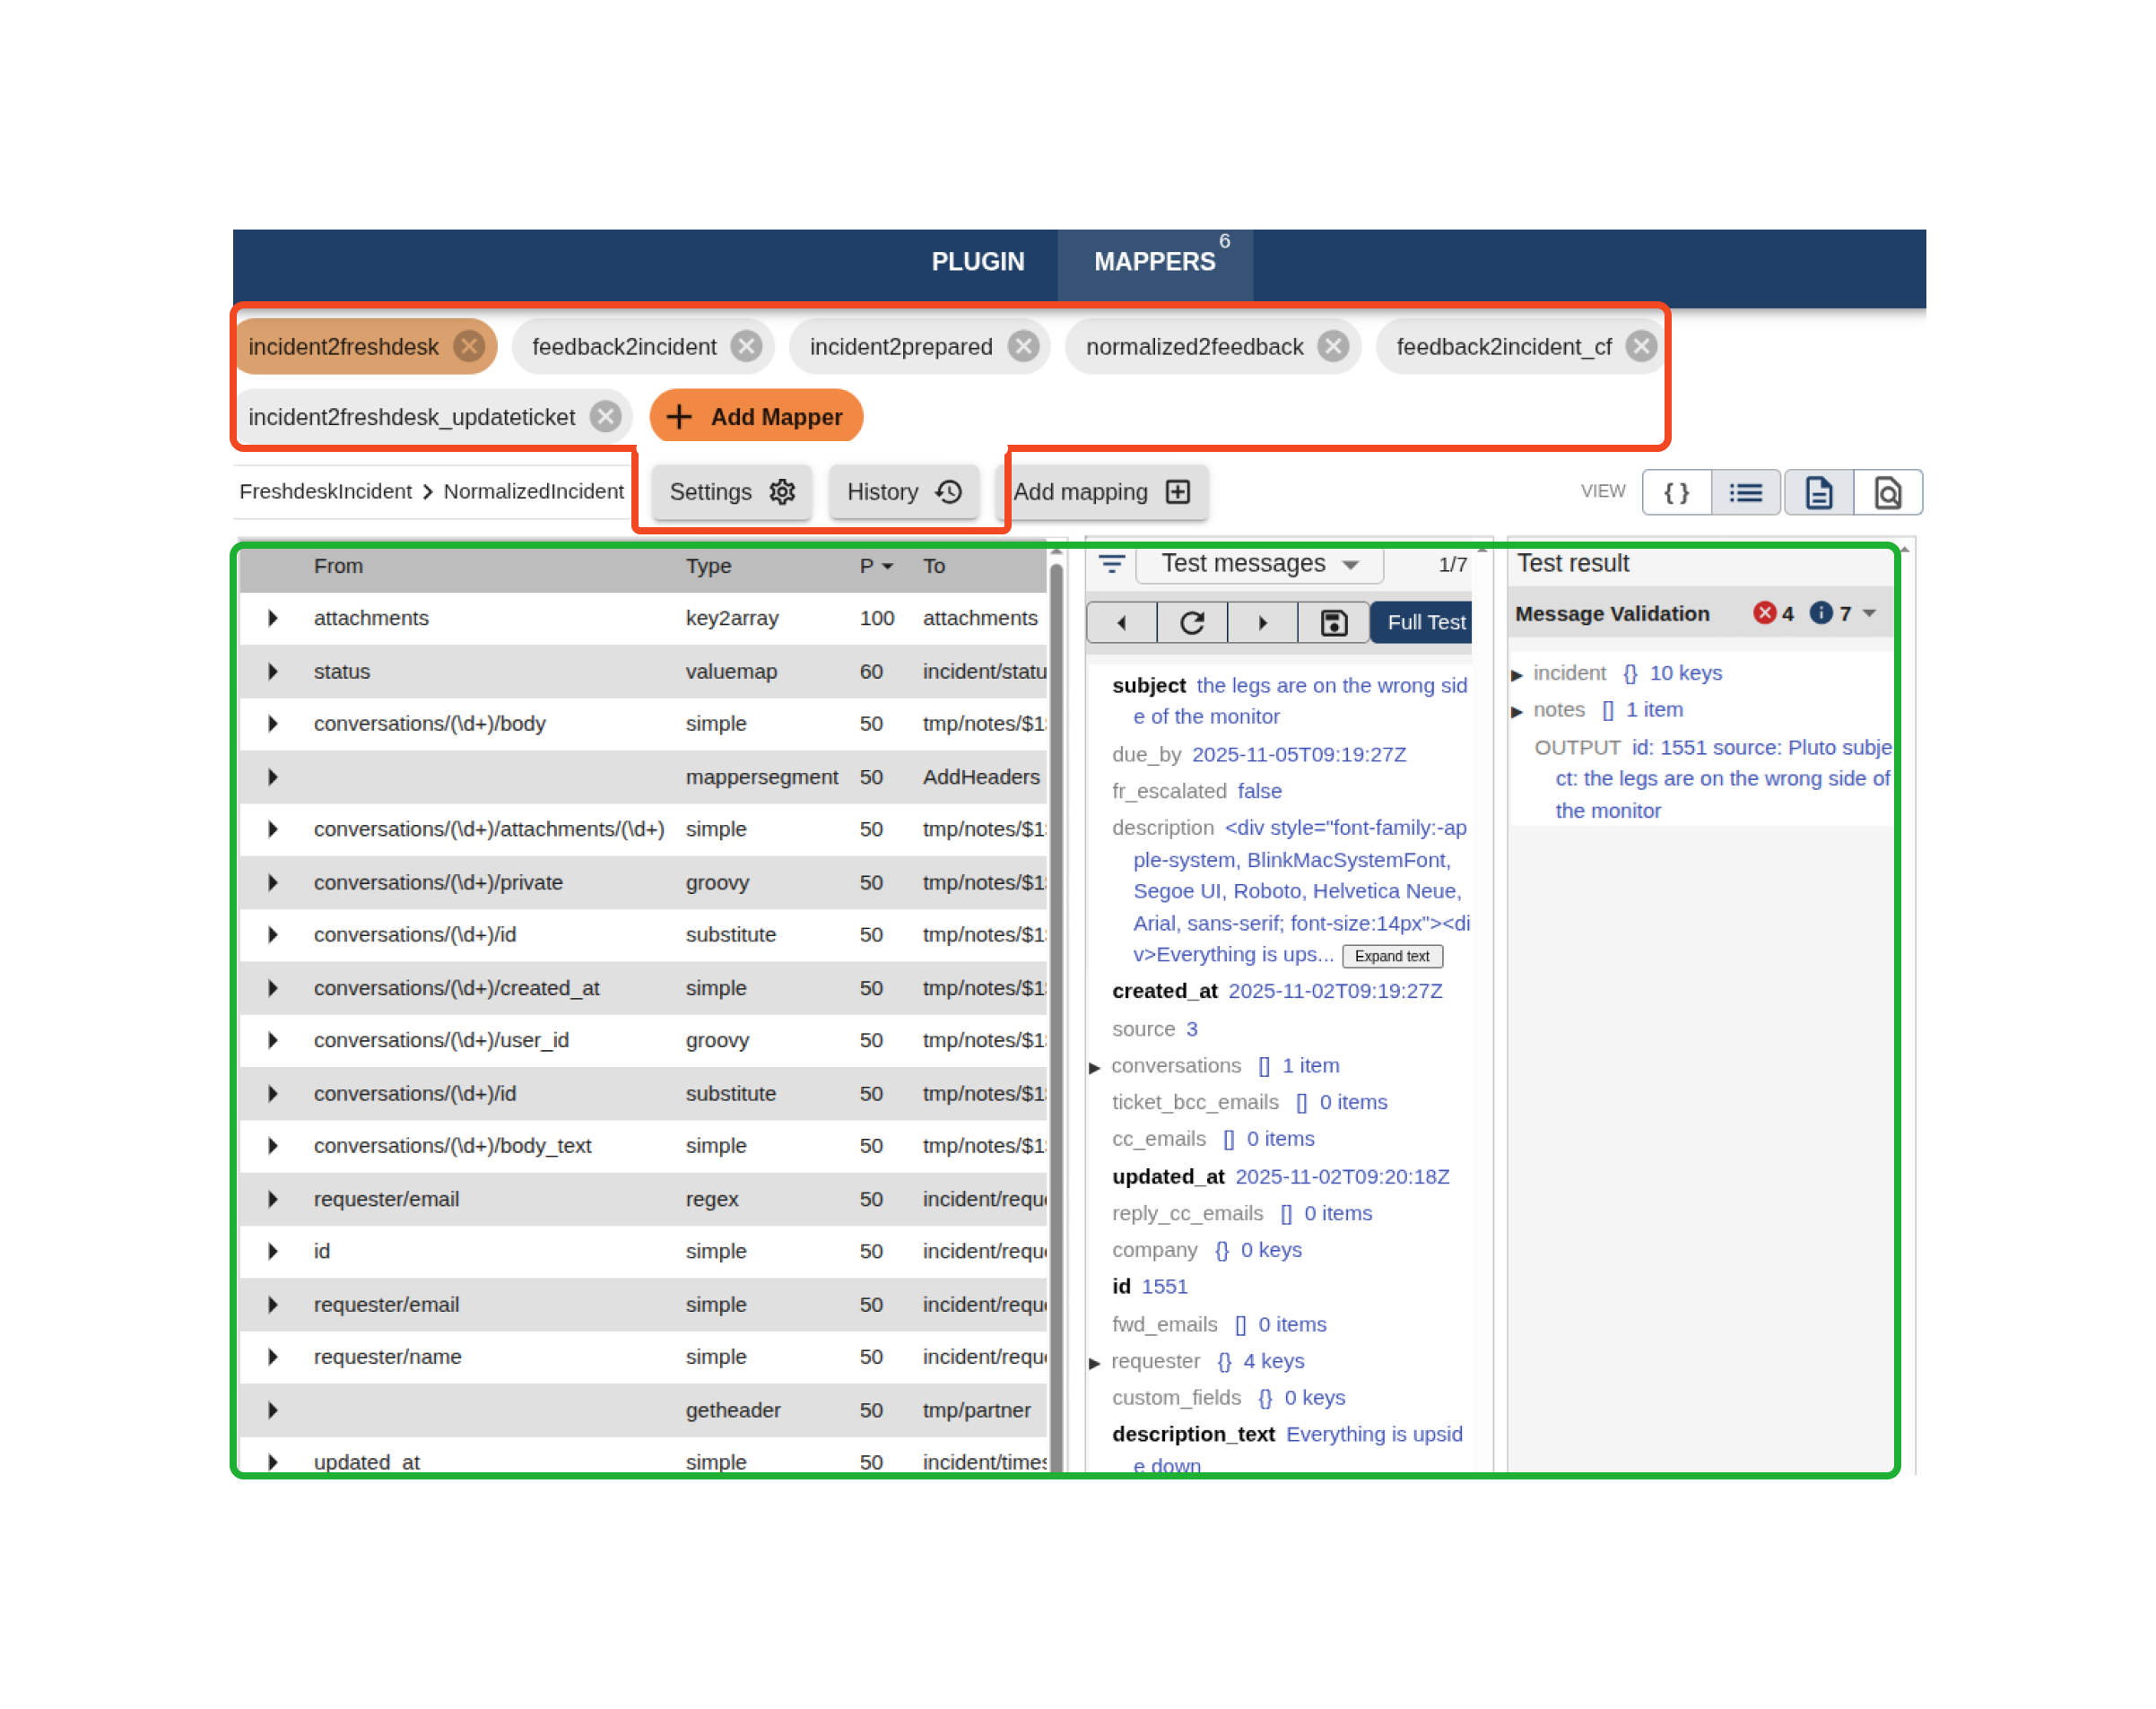
Mapper Configuration
At the top of the screen, you’ll find the Mapper List, which displays all mappers configured for the selected plugin. 
In this example, we have a incident2freshdesk mapper and a feedback2incident mapper.
Each individual mapper has its own configuration and version history. Below the list are the mapper related settings:
-
Source → Target Message Types:
Shows the message types that the mapper accepts and produces (visual only).
-
Settings:
Opens the configuration window where you can define mapper-specific settings, including source and target message types.
-
History:
Displays version history for the mapper, allowing you to restore a previous version if needed.
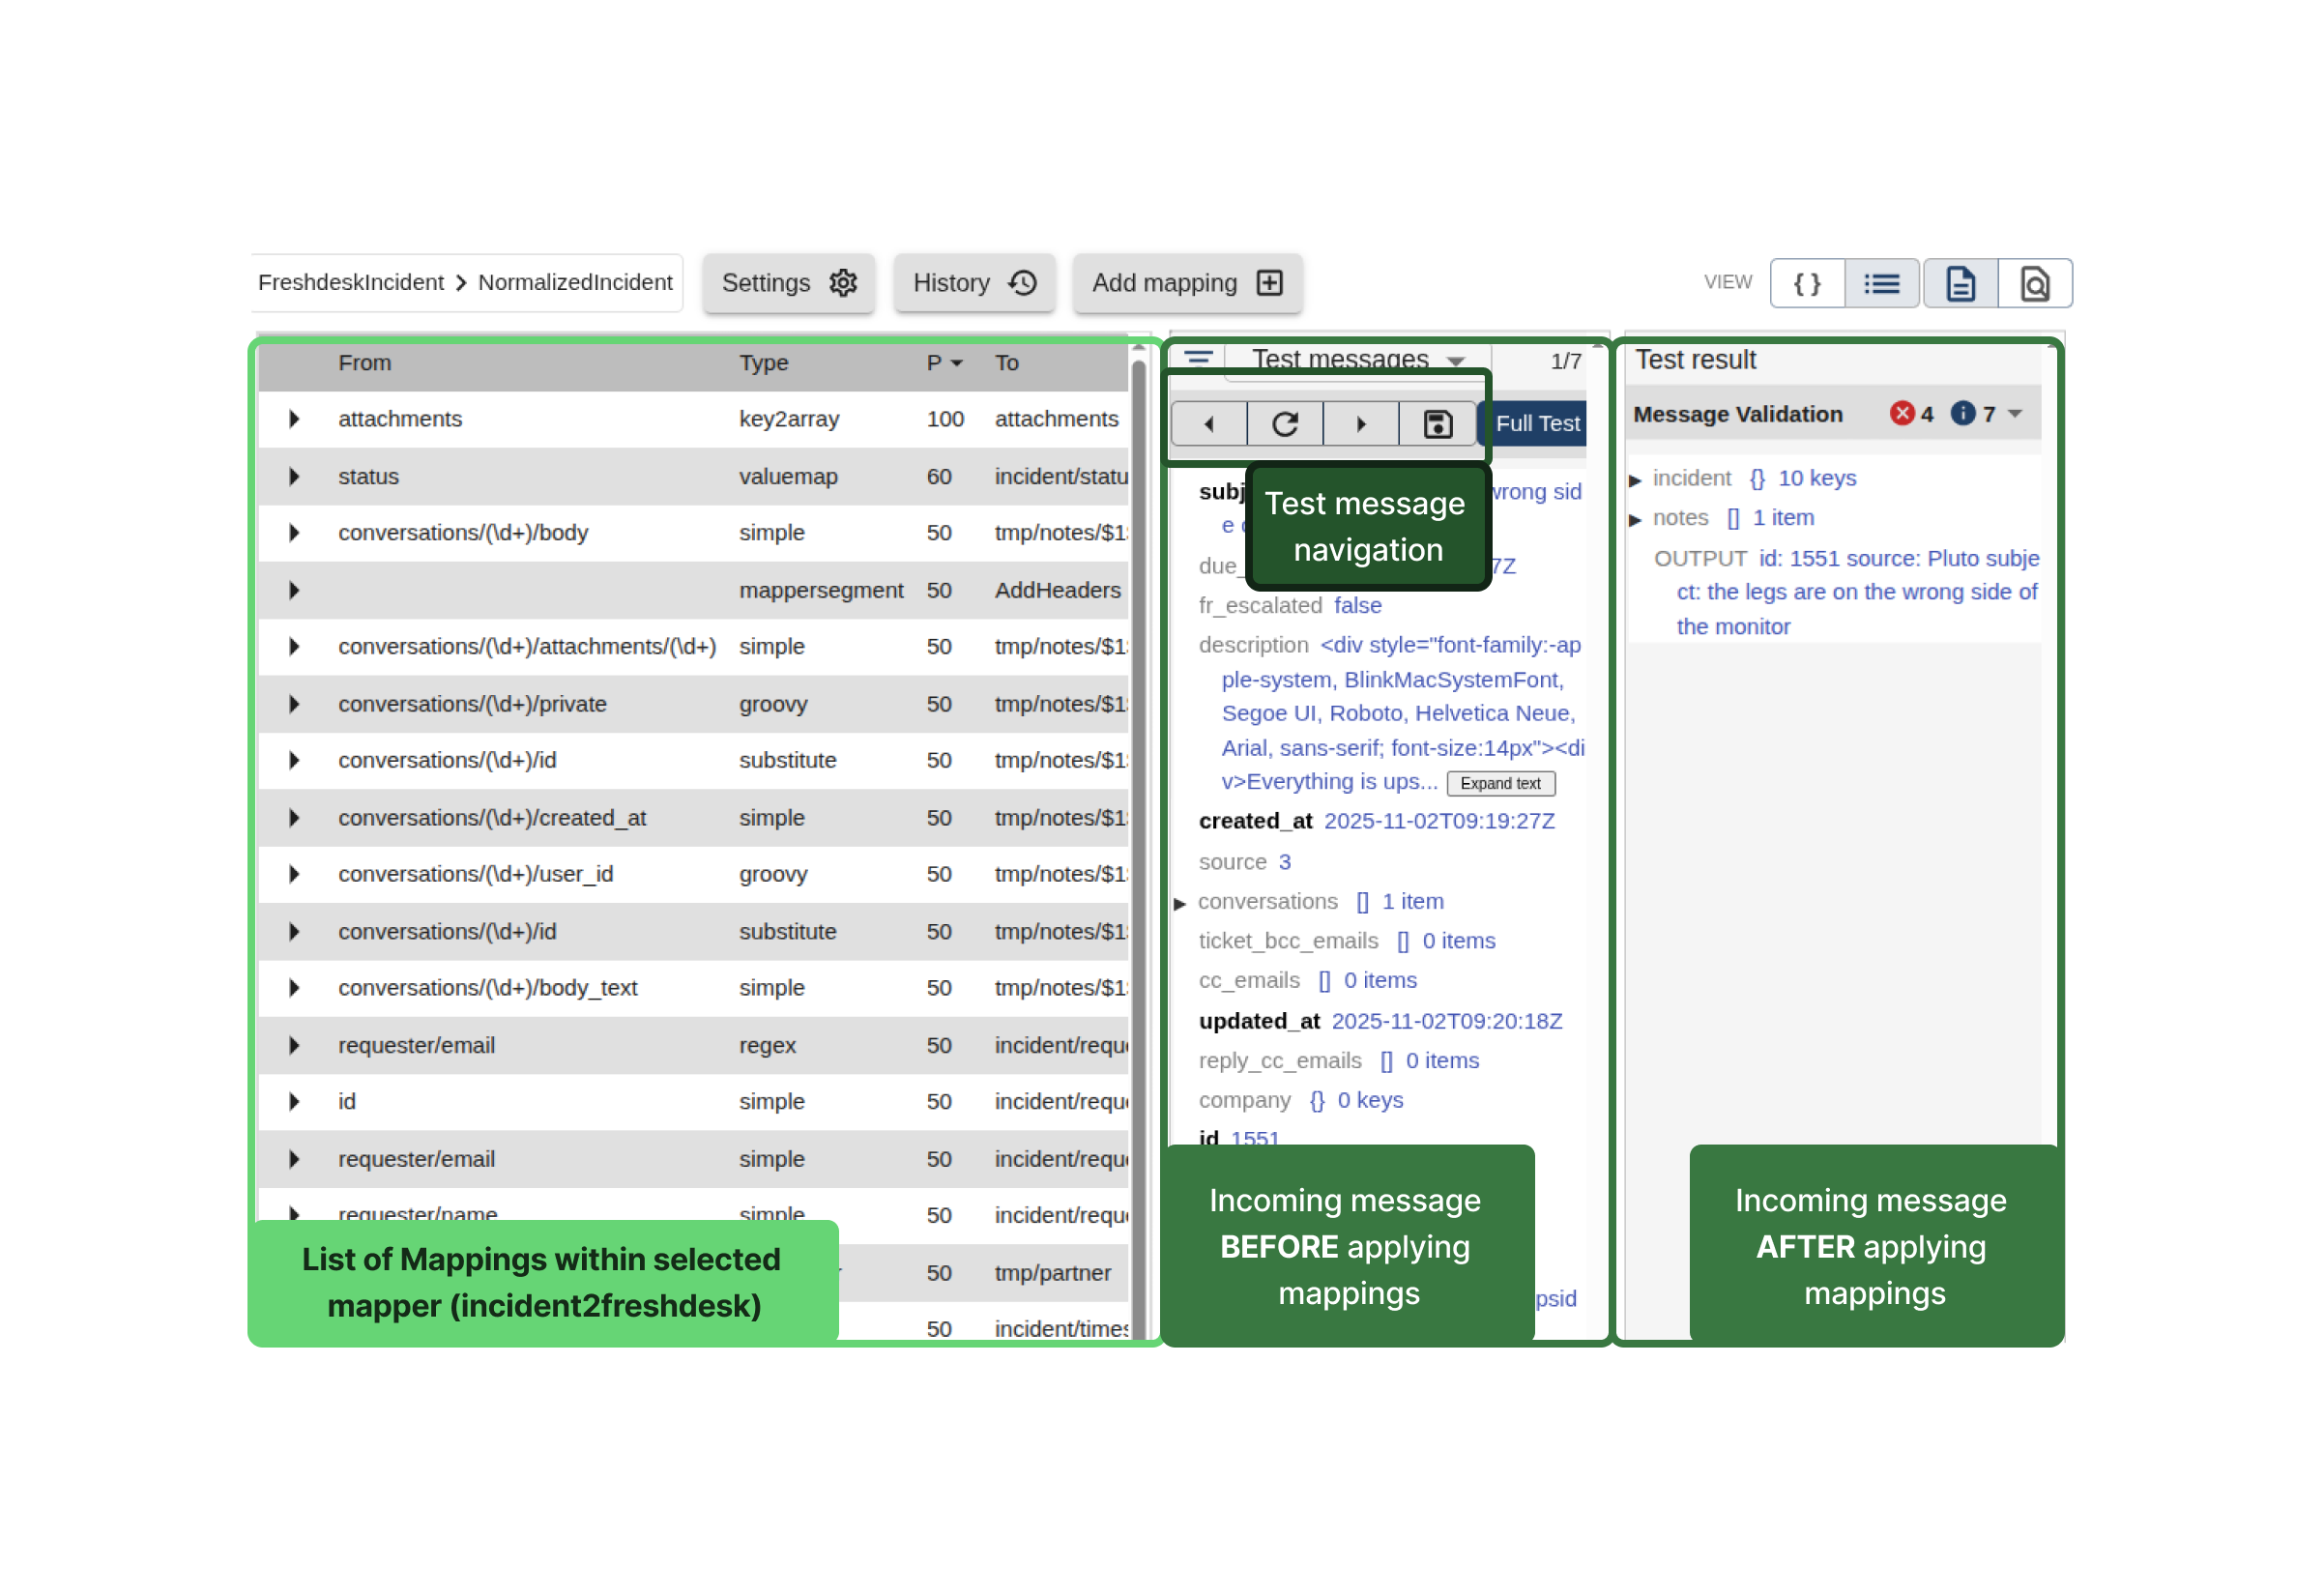
Mappings within a mapper
The green section highlights the Mappings Panel, where you can view and test all field-level mappings contained in the selected mapper.
-
Mappings List (Left):
Displays all mappings defined within the mapper. Each mapping performs a specific transformation or rule. -
Test Panel (Center & Right):
Allows you to preview how messages are transformed.- Test message: Message before mappings are applied.
- Test result: Message after mappings are applied.
- Test message navigation:

- You can browse through available incoming messages using the menu buttons
- Full test button: Executes a full test, including API calls within the mapper.
- You can test with messages retrieved from connected endpoints, or Uploaded manually via Saved Messages.
Learn more about Testing Mappers.